Saturday, April 14, 2018

Mother's Day Specials

Hello, Lovely people across the globe. I do hope everyone has been doing good.
I know you haven't heard from me in a little bit but like with everyone life has been busy.
Today I am going to be giving you a Mother's Day Special. From today until May 13, 2018, you can purchase any of my patterns off Ravelry for 10%off.

I have crochet pattern and knit patterns that are available for purchase. So might be a little something for everyone.
Country Cabin C2C

Star Burst Hot Pad

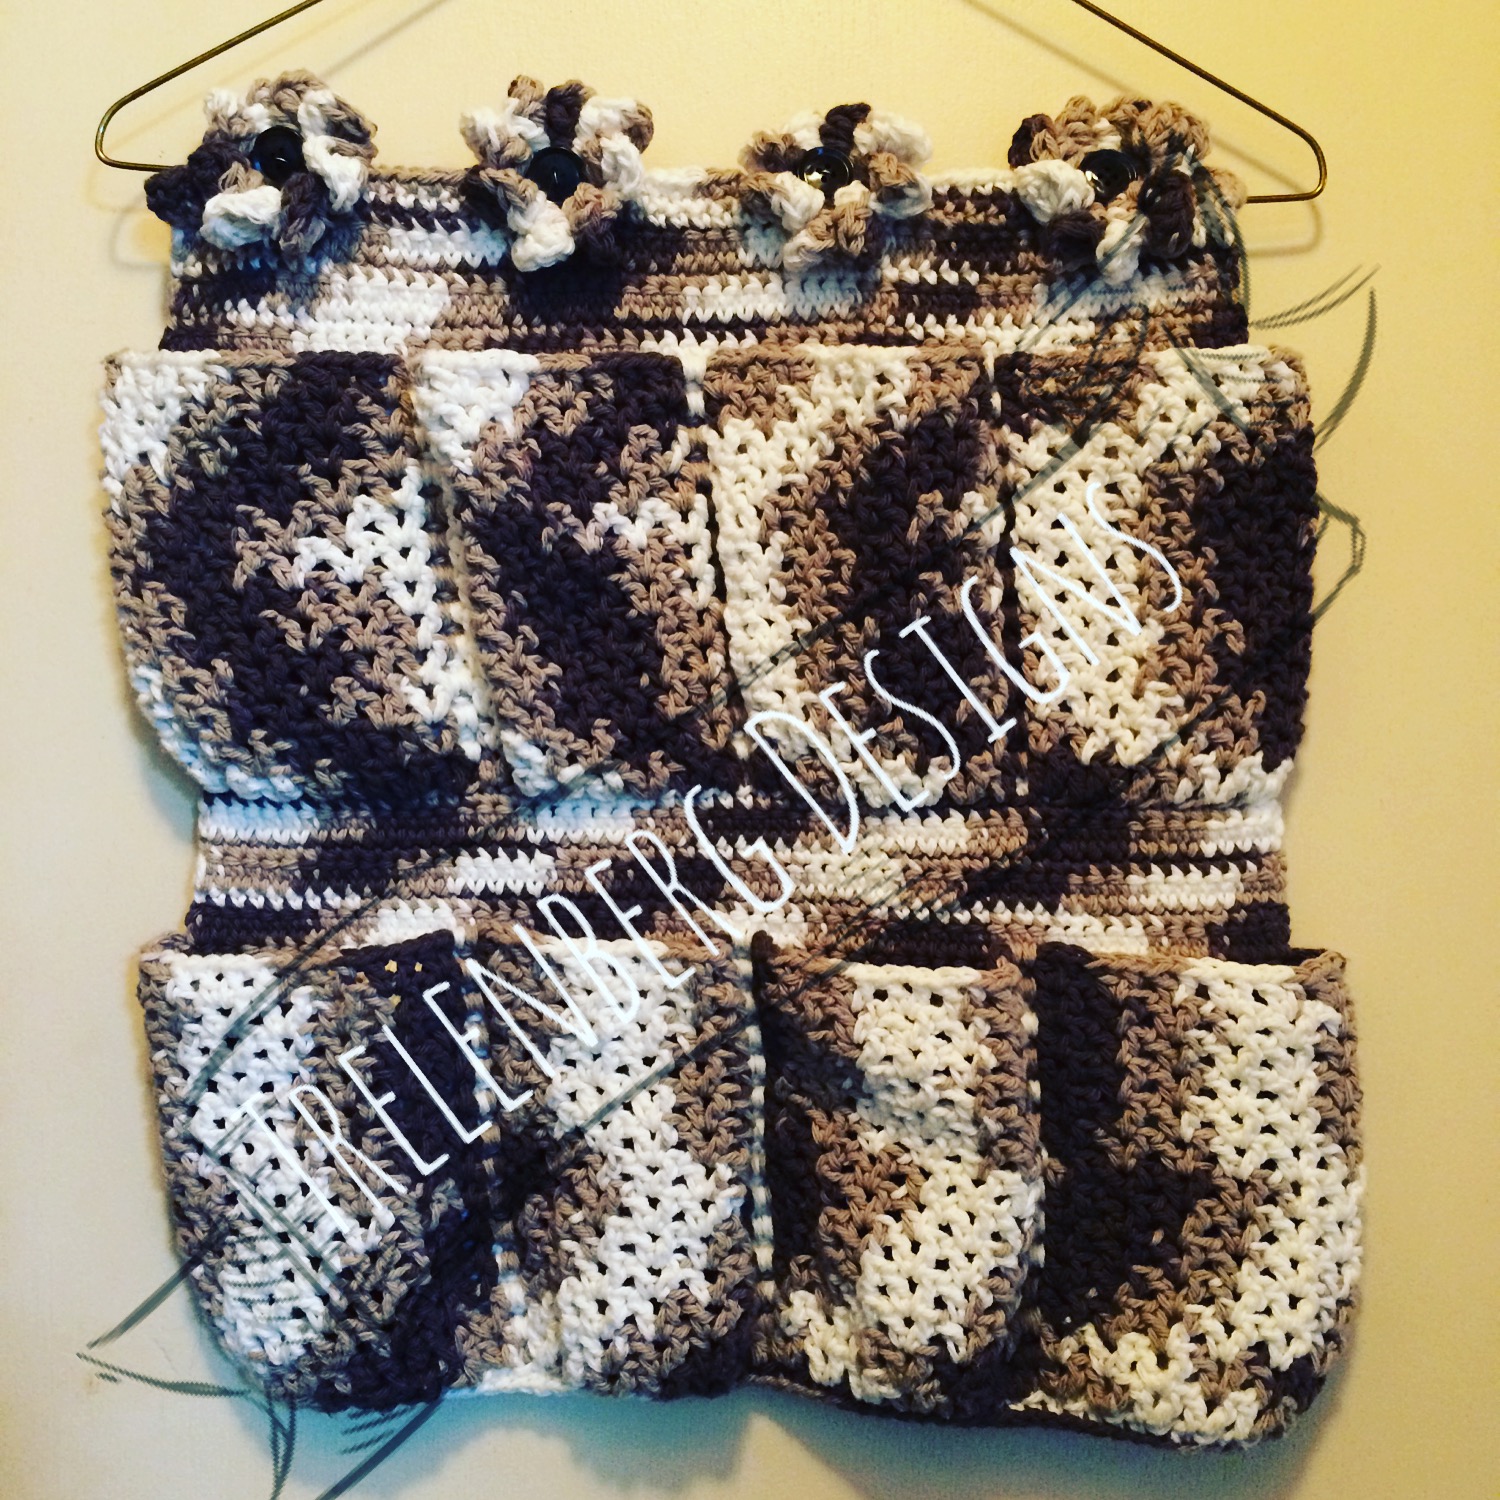
The Seamless Hanging Organizer

Hen Fruit Collecting Apron
Egg Picking Apron

Loops of Love


I am also excited about a wonderful company that I am with. They are also running a Mother's Day Special of 10% off purchase. 
I love this company. I have bought a few things for myself and so far very impressed with the products. Yup every intention of buying more 💓😍
Bath Melts

Tart oil Warmer
Tart / Oil Warmer

Candles

Wax Melts

Soap


What wonderful company is this? Ice N Fire is a family owned BC Canada company. High quality products that you are sure to love.

Friday, April 6, 2018

Ice N Fire Polyresin tart warmer, wax melt, aprraisel


Love what you see, You can purchase both the horse tart warmer and the wax melt at www.icenfire.ca/#reney plus lots more. The wax melt in this video took 1/2 hour to melt with the light on high. Adjustable light.

LOVE MY ICE N FIRE

Friday, March 23, 2018

Excited about my new adventure

A very exciting moment for this country wife.  I decided after trying a product from Ice N Fire that I would sign up to be a consultant.  And as of last night, I did. EEEK  Yup that excited.

Ice N Fire

What does Ice 'n' Fire have to offer? Well, that is quite the list. The item that I personally bought to try was the luscious lavender wax melts.
Luscious Lavender Ring Wax Melt
I can honestly say I wasn't all that sure about the smell to start with but yes I have come to find it very relaxing. And boy, with my 2 kids I really need help in the relaxing department as I am homeschooling my 8 years old ADHD son and trying to keep his 2-year-old sister distracted enough that he is able to do his schooling as well as I signed up to do a bookkeeping course.  Oh yeah, my life is busy and sitting here with the scent of the wax circling me ahhhhhhhh.
Oh yeah, it also holds a SURPRISE and I choose the ring for the surprise but you can also get it with a necklace. 
Very Beautiful. LOVE


MY BEAUTIFUL RING. The jewelry comes with a tag attached so that you can do an appraisal on it and for this beauty, it said $55.  The rings can be anywhere from $25 to $5000 and the necklaces $50 to $5000.

Now my want list is so big. My next item that I am going to buy just for me is........................


One of the products I have on the way to me right now and can't wait to see what it looks like in person is.................
Horse Oil Warmer
Horse Oil Warmer
                                                                                                                                                                                                                                               I bought this to give to my mom an am looking forward to seeing it and seeing what she thinks of it.  


Well that is all for now.  
Country wife with country crafts.


Next to come will be my new designs for crocheted hot pads. 
Lots of love to all
Reney
Country wife

Have a wonderful day and see you soon.

Friday, March 16, 2018

How to - learn basic crochet stitches

Have you ever wanted to learn how to crochet but were intimidated by all the pretty projects that you look at and think how could I ever do any of them. Well, the first thing you have to learn is how to go about the very basic stitches and the rest shall follow.

I have made a video showing how to start crocheting.

How to make a slip stitch, how to do a single crochet, how to do a half double crochet and how to do a double crochet.


Now I am just starting out with trying to do videos to help and to do my own personal patterns into videos for the world to share. So please forgive me when they aren't the top quality videos that you can find. As I am a mother of 2 and we are a single income family so I am using my phone to take the videos.

I am redoing some of my videos so that there is voice for all of them as well as doing closed captioning on all of my videos.


I do so hope you liked my video on the basic crochet stitches.  If you did please subscribe to my YouTube channel for updates as well as subscribe to my blog to get monthly updates on new patterns and videos that I have managed to do.

Thank you everyone and happy crafting.

Reney Trelenberg

Crafts with a Country Wife

You can find all my patterns on Ravelry. Click HERE to go directly to my Ravelry store to see my patterns.


Thursday, March 15, 2018

How to - upload a project onto ravelry

Do you love Ravelry for all its wonderful patterns that designers have shared. Do you wish you could figure out how to go about putting your projects on there to share and keep track of.

Did you use a pattern off of Ravelry and would like to connect your project to the pattern.

Well here I have made a little video to help you out.  I have done it with subtitles explaining how I have gone about putting a project and linking it up.


I do hope you enjoyed learning how to put your project on Ravelry.


Tubebuddy helped me make this video. If you would like to find out more about tubebuddy feel free to click the affiliated link at no cost to you.

https://www.tubebuddy.com/TrelenbergDesigns

Saturday, January 27, 2018

Making Cake Slow Cooker Style

My little man turned 8 yesterday but I didn't do up a cake for him as he was a very busy boy. His one set of grandparents travelled a long ways to spend some time with him so I figured today I would try and make a cake. Well I know how to make cake buuuuut well I currently don't have a working oven so I have been trying to think on how I could go about making him a cake.
Electric Frying pan with a cooling rack inside. Nope can't try that right now as I don't have a cooling rack that will fit in my pan.
Microwave. Don't really want to try that right now as I'm not really into microwaving anything.
Slow Cooker Hmmm well why not try it as out of other options.

                                      
Today this country wife is going to give it a try and hope it turns out. Call me crazy but here we go.
Lets see
You always preheat your oven so lets preheat the slow cooker. Lets try it on setting low.
I'm going to line the slow cooker with parchment paper so that the cake doesn't stick to it.

Here I have put together a slide show to show what I did. Yes the cake turned out awesome, Go ahead and get a chuckle out of the decorating. I'm not very good at it.

 For the parchment paper part. I cut a circle out and cut along the bottom of another to layer the bottom of the crock pot and have it come up the sides.

As my cake was cooking I checked on it every 1/2 hour as I didn't know for sure what the temperature was and for my crock pot it took 2 hours to cook. Now yours might be different so I would keep an eye on it and do the same with checking every 20 minutes to a half hour until it is done.

My son was very excited and it turned out very moist and tasted pretty good. I shall do this again one day but the next time I try I shall try it with my pot on high to see how long it takes and if it cooks the outside but not the inside.

Thank you for taking the time to read my Cake in a slow cooker. Any feed back would be wonderful. How did yours turn out?

Trelenberg Designs
Crafts with a country Wife


Monday, January 15, 2018

Welcome To 2018

Happy New Year wonderful crafters of the world. I do hope all is enjoying the New Year.
This one is a chain of 78, and brim is 31

I know that I haven't posted in a few months as life got busy.  I have been homeschooling my son which hasn't always been an easy feat. I am hoping that this year I can be more active in posting new crafts to try.  My first of the year is going to be a crocheted item. And I am going to be posting it below as my welcome to a New Year gift.
 I have been thinking of what I could make.  I do know that last year the messy bun hat was in style. Personally I don't understand that at all but I was never one for wearing my hair up on top of my head.  So for my first pattern I am going to make an ear warmer that will work great for messy buns. It shall cover your ears, Shield your eyes, and you can easily wear your hair up.  Are you ready.  I will only be posting one size on this blog. I will be doing up more sizes which will be published on my Ravelry store. There will also be a video for those that do better with visual.
Here we go!


Simply  Bliss with Optional Brim
Adult Size
CH - Chain
SS - Slip Stitch
DC - Double Crochet
FP - Front Post
BP - Back Post
* * - Repeat stitches in between Astrid's

Pattern custom to any size so gauge and yarn used is your personal choice.

Pattern is written in US terminology


For adult size.
Make chain approx. 2 inches smaller in length than circumference of head. End with even number of stitches
    ei. head is 22 inches. Make chain 20inches, Double check to make sure its long enough by seeing if it will stretch out a little past desired length.
CH 78, SS into back bump of 1st CH
Check chain to make sure of no twists when joining
CH1, DC in each back bump, SS into top of 1st DC. Same number of DC as your CH
78DC
Used purple yarn to help keep count

CH1, *DCFP, DCBP* repeat through all DC SS into 1st DCFP
I have 39 DCFP and 39DCBP

Repeat last row till desired length from top to bottom
4.5 Inch with 2.5 inch brim

Work Optional Brim without fastening off
CH1, DCFP till you reach desired brim width, Have it so its an uneven number so start and end of brim are on DCFP for a matched look.
My brim is 31 stitches
Top side of brim

CH1, Slip hook through back loop of last 2 rows Yarn over, and pull through all 3 loops, Work across brim 

Underside of Brim
Fasten off, Weave in ends and Enjoy your new Simply Bliss.

Mini Simply Bliss Video with Brim and Flower 💓


If you would like a printable version there will be one available on my Ravelry store soon for a small cost.

Thursday, September 14, 2017

Extra Eggs, How about making Pickled Eggs

Update: Just after 24 from the time of pickling I do a little taste test and Hubby says they are the best pickled eggs he's ever tested. After testing a few batches that I made and letting me know that something needs to be a bit different I'll take his word. Also said that I had better of wrote down the recipe so that I can make more 💋💋💓💓

Hi all you lovely crafters of the world.
Do you happen to have way to many eggs with no idea as to what to make with them.
How about pickling them. You can even use some beat juice to color them pretty.

Here is what I did to make my pickled eggs.  Needless to say until they set hard to say if I got this right. But if I do need to change something I shall do an update to this post.
I have been expermenting a little so I do know that I got the vinegar/water figured out but as for the rest.

Start off with making sure you have boiled your eggs long enough to be hard boiled. Where we live I find it best to boil eggs for pickling for about a 1/2 hr. The eggs are hard boiled by 10 minutes but I boil longer for picked eggs.

Make sure you have a sealable jar that is big enough for 18 eggs.

Find the perfect costume at an unbelievable price. Findcostume.com
Pickled Eggs 18 Eggs
3 Cups white vinegar
1 Cup water
2 Tbsp Mrs. Dash Garlic and herb
2 Tbsp Sugar
1 tsp seasoning salt
1 onion thinly sliced


Put your cooled shelled eggs into jar.

In a pot put your vinegar, water, spices, onion and sugar.  Bring to a boil turn down so its a light boil and proceed to do light boil for 5 minutes. 
Let broth cool some so that you don't break the jar.  Pour over eggs, put on lid and move eggs to fridge. 
Let the eggs set for about a week (lets the flavor get into the eggs better)
Proceed to enjoy

Happy Crafting to all the wonderful crafters 


Thursday, September 7, 2017

Trolls Trolls Trolls

Every where I seem to look there are troll items all over. The most popular being the Troll hat for kids. And is it ever cute.  It was even suggested to me by a friend to make some in our little town. So today I am off to make my first troll hat.  Hoping it turns out cause as you know I don't go by patterns I make my own as I go along.
There are going to be 2 different kind of troll hats that I plan on making.  There is going to be the full troll hat. And I am going to try and do up a Pony Tail Troll hat.  As I start this blog I haven't started to make them yet.  As I go write more, I will be building the hats. That way I can take pictures and post my progress. Okay. Lets start.


Felici Self Striping Yarn from Knit Picks

Here is what I used to make the hats and the terms I used to write out the pattern which you can purchase HERE The first 100 buyers will receive 25% off purchase price. Use coupon TROLLS

US Terms used to make hats.
CH - Chain
SS - Slip Stitch
SC - Single Crochet
DC - Double Crochet
LDC - Linked Double Crochet

US H/5mm hook
Worsted Weight Yarn (can use bulky yarn for hair as well if wished)


Here I have got the troll part way done. Now I just have to do the hair.
Before Ears and Hair

Ears are now on

UGH Hair. I'm starting to hate hair.
Hairy Scary

Decided it needed a headband
Well I have completed this troll and now to make a few more to put up for sale.  I do so hope you love your new Trolls Hat.  I would love to see pictures. If you are on ravelry would love to see project linked to pattern.  Next one I will take more time brushing the hair.

Love to create.
Happy Crocheting
Reney
Trelenberg Designs
Country Wife

Friday, September 1, 2017

C2C corner to corner tutorial by Trelenberg Designs

Hi all wonderful crafters.
I do hope your having a wonderful day.
Today I share with you my newest pattern. C2C Country Cabin Baby Blanket. The video that is attached is one that will help you with the pattern should you need it.
 I still haven't figured out what kind of border I should do for this one. And I didn't put a border in the pattern as everyone has their own thoughts on it and it should be your own personal touch.

In the pattern I have also added pictures to show the stitches and how I went about doing the Corner to Corner.  I do hope it helps and that people enjoy making this blanket.

Without the border it measures approx 32x32 inches.  I am thinking of making bigger ones and putting my kids names on them so that they each have their very own blanket.


You can also find Step by Step Pictures HERE

This is personally only my second time doing the C2C and I like it as when you hit the half way mark it just keeps getting quicker then. Which is nice cause blankets do take a long time to make.

I do so hope you enjoy.
Happy Crafting
Reney
Trelenberg Designs

Wednesday, August 30, 2017

Crab Apple Jelly. Have you made it.

Good Afternoon wonderful crafter's.
Today I am taking me turn at learning how to make crab apple jelly. That's right. I have never made it before so this country wife is doing her first attempt. I searched online looking for a recipe but like all there is so many that does a person really know. Nope so I'm kinda following but winging it at the same time.


All common things were remove stems and bottoms and any blemishes. Wash apples off.  So got that all done and put them into stock pot to cook.


Yup Apples are cooking for 20-30 minutes. Hope this is all good to go.


While I wait for the apples to cook any guesses as to what else this country wife is doing. Ugh yup laundry. I don't think I will ever get caught up. LOL

Now back to the apples. After apples are cooked its time to strain them to make the jelly.
Taking me a while to strain the juice out but I did read that you can strain them overnight which is good and what I have done. Now because I don't have any cloth to strain the juice through I'm using coffee filters. Yup its taking me a while. I heated up the juice some to help strain it. Hopefully it doesn't hurt it any.


Now to measure how much juice I have to figure about how much sugar I need.  Now most of the recipes I've come across use a lot of sugar to me. No thanks. So here is what I did.

1 C Crab Apple Juice
5 tsp Sugar

Stir to dissolve sugar
Cook for about 40 minutes on a roiling boil. Don't forget to skim the froth off the top as it cooks
To know if its been cooked long enough cool off some spoons and test by putting some of the jelly on the spoon and see if it sets. If not cook a bit longer.
 
 I do hope mine turned out right.
I put some canning jars into some water and boiled so that they were nice and hot. Put jelly in and put the lids on. Oh this is my first try and its a little nerve wracking.

I started out with 11 cups of juice and wound up with 4 250 ml canning jars.  That was a lot of vapour lost so not sure if I did something wrong to lose that much but when you think about it you are going to lose a lot at a boil for 40+ minutes.


Well I have finished up my first experience at canning anything. Now just hope it turns out.  Let it cool and we shall see. 😅💖

Well that is all for today. I will post an update in the comments section once I open a jar up and see how it turns out.  

I have 2 wonderful cheerleaders to help me out.
Yes they are quite the cheer leaders 💖

Thank you everyone and Happy Crafting
Reney                                             
Trelenberg Designs
Country Wife


Wednesday, August 23, 2017

Hoping I can help my parents. Pattern Sale on Ravelry


Sitting here wishing that I could help my parents out right now. My parents are awesome people and I wish that I could help. But with me being a stay a home mom I can't come up with the money to help mom and dad right now which is really bothering me.  My parents are both hard workers and have helped me out in so many ways that I can never repay them. All I want is to be able to help them out some. Having to move and dad didn't get a chance to work this summer as he was hired on a logging company and the whole area around them is on fire.
Yes the picture of this fire isn't that far from my parents which scares me

I have started a gofundme in hopes or raising some money to help out but not sure what my chances are with even getting a dollar on there as there are so many causes on there.

Tuesday, August 15, 2017

Deciding on a New Blanket Pattern

Well I am currently working on a new pattern again. This on is going to take a bit of time as I am planning on making it in both crochet and knit. Same design but this way it wont matter which craft you are into you will be able to make this beautiful blanket.
Blanket will be called Country Cabin and we right now I have the design done but still need to make it. And to make it I need to get more yarn.
This is one I can't wait to share as in my mind it looks so beautiful. Now to get the yarn and make sure that it turns out the way it should before I actually post a pattern.
Now quick question. Favorite way to crochet a blanket
Corner to Corner or One end to the other. Might even do the pattern both ways.  And pattern will be tested before release.

Well now that I have it all planned I had better get going. House work today and hopefully soon I can make it to a store to start working on it. And then have to decide what size it will be when all done YIKES. wonder if I can do it where it can be any size. I should be able to, guess time will tell.

Well I hope everyone as a crafty day and cant wait to share more.
More helpful videos will be released soon as well.

Thank you for your support
Happy Crafting

Reney
Trelenberg Designs

Friday, August 11, 2017

Store more with the Seamless Hanging Organizer

Do you wish that you had more room to store a few things. Say in the bathroom or your travel trailer/camper. Do you love to crochet. Well, How about building yourself a Hanging Organizer.

 Give you a lot more storage and can hang on the bathroom/bedroom door or even hang in a closet.
Now to figure out what to store it it. Well the pockets are big enough to store your bathroom necessities such as shampoo and conditioner and other toiletries, or you could store your cleaning supplies like toilet bowl cleaner, window washer Mr. Clean and keep it hung up out or your little ones reach. There are lots of different ideas for what to put in the hanging organizer. And its completely up to you as to where you put it and what you use it for.
Like to make and know of family and friends that could use one. Yup build as many as you wish. And because you have taken the time to build it plus bought all the supply's needed and the pattern well you know what SELL them. That's right I have no problems to you selling the finished product as it is you that took so much time to make it. Please don't give or sell my pattern but any pattern that is bought from me you can make the product and sell as little or as many as you want. 💖

The pattern for this organizer is written so that it is built from the bottom up and you don't have to seam any part of it.  I hate seaming and if I wanted to be a seamstress I would but NOPE I work with yarn and hate seaming so my patterns if possible are built with no seaming. Yes I know I'm stressing the point but I can't help it as I know lots of people that don't like to do seams either so I know I'm not alone.

Now where can you find the pattern? Well you can find The Seamless Hanging Organizer on:
Ravelry, Etsy, and Craftsy.

Till Aug 18, 2017 You can get the pattern for 25% off no coupon required. Only on Ravelry


New Crochet Kits at knitpicks.com Gorgeous Tonal Merino Wool s at knitpicks.com New Majestic Needles from Knit Picks